Creating Cool Games With Ebiten
Language
- unknown
by James Smith (Golang Project Structure Admin)
The Ebiten game framework was written by Japanese software engineer Hajime Hoshi. The framework is designed to make it easier for Go programmers to create native-looking 2D games, by taking care of all the boilerplate code for us.
(Note that since I first wrote this post, Ebiten has been renamed to Ebitengine.)
Table of Contents
Installing the Ebiten Game Framework
It’s really easy to install Ebiten, since it’s available as a Go package (with a few child packages containing other utility and specialized functions).
We simply need to run go mod init, to create a module in the directory where we want to write our code, and then we can download the package, just as we would any other:
go get github.com/hajimehoshi/ebiten/v2This will update our go.mod and go.sum files, adding necessary information about the dependency, so that other users can reinstall the same versions if we decide to share our codebase.
Hello, World: Creating a Window
Before we try to do anything too impressive, let’s just open a window and print some text to the screen, so we can make sure that everything’s working properly:
package main

import (
	"github.com/hajimehoshi/ebiten/v2"
	"github.com/hajimehoshi/ebiten/v2/ebitenutil"
)

const (
	screenWidth  = 300
	screenHeight = 300
)

type Game struct{}

func (g *Game) Layout(outsideWidth, outsideHeight int) (int, int) {
	return screenWidth, screenHeight
}

func (g *Game) Update() error {
	return nil
}

func (g *Game) Draw(screen *ebiten.Image) {
	ebitenutil.DebugPrint(screen, "This is a test.")
}

func main() {
	ebiten.SetWindowSize(screenWidth*2, screenHeight*2)
	ebiten.SetWindowTitle("Ebiten Test")

	if err := ebiten.RunGame(&Game{}); err != nil {
		panic(err)
	}
}
We create a Game struct that implements the ebiten.Game interface: it must have at least two methods, Layout and Update, but it is also recommended to add a Draw method, so you can separate your code that handles the graphics on the screen from the other logic.
The screenWidth and screenHeight constants are returned in the Layout method in order to set the size of our screen: this determines how many pixels we’ll have to draw with.
However, you can see that we double these constants when we call the ebiten.SetWindowSize function: this means that the window will be twice the size of our drawing area. In other words, every pixel will appear as a square with twice the normal dimensions (and thus four times the normal area — since 2×2 is four times greater than 1×1). This will give our game a vintage, pixelated appearance.
Using the ebitenutil.DebugPrint function in the Draw method, we don’t need to worry about setting font-faces or text sizes: our message is just written in a default monspaced script from the top-left of the screen. As the name suggests, this function is only intended for testing purposes, and it can only handle strings whose characters are made up of ASCII runes.
There is also an ebitenutil.DebugPrintAt method, which takes two extra arguments, an x and y position for the text. The "ebiten/text" package provides functions for drawing text with greater precision in a proper game, where accuracy matters.

Drawing a Square on the Screen
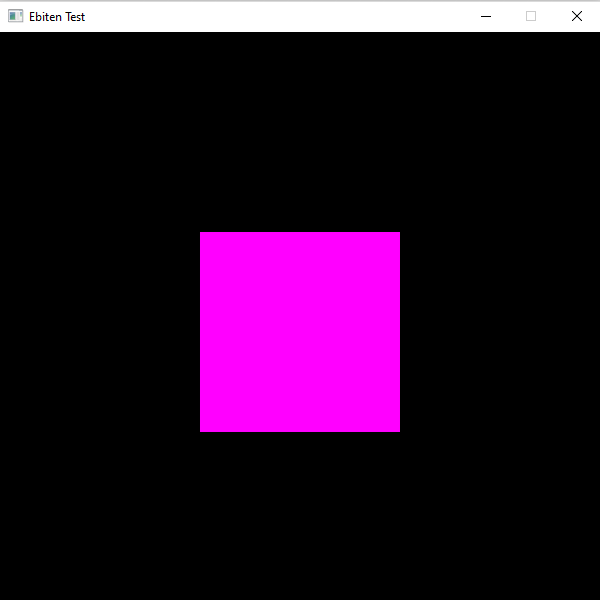
Let’s do something a little more interesting now. We can draw a square in the middle of the screen simply by iterating through the relevant pixels and setting each of them to a different colour:
func (g *Game) Draw(screen *ebiten.Image) {
	purpleCol := color.RGBA{255, 0, 255, 255}
	for x := 100; x < 200; x++ {
		for y := 100; y < 200; y++ {
			screen.Set(x, y, purpleCol)
		}
	}
}
You can see how we define the purple colour that we use by its Red-Green-Blue-Alpha value, as I've previously discussed in more detail.
Drawing a Ball
A square is easy, but that's not all we can do, of course. We can use some clever mathematics to draw a circle.
func (g *Game) drawCircle(screen *ebiten.Image, x, y, radius int, clr color.Color) {
radius64 := float64(radius)
minAngle := math.Acos(1 - 1/radius64)
for angle := float64(0); angle <= 360; angle += minAngle {
xDelta := radius64 * math.Cos(angle)
yDelta := radius64 * math.Sin(angle)
x1 := int(math.Round(float64(x) + xDelta))
y1 := int(math.Round(float64(y) + yDelta))
screen.Set(x1, y1, clr)
}
}
func (g *Game) Draw(screen *ebiten.Image) {
purpleClr := color.RGBA{255, 0, 255, 255}
g.drawCircle(screen, 150, 150, 50, purpleClr)
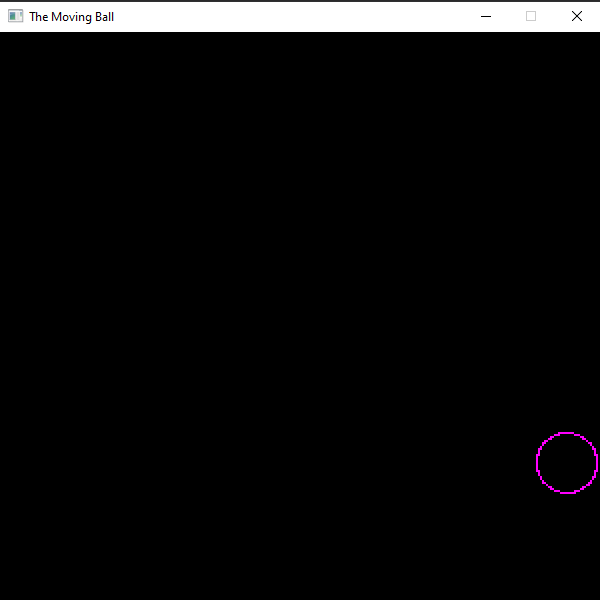
}As you can see, we have created a helper function to handle drawing the circle, which allows us to reuse the code if we ever need any more balls on the screen. You don't need to understand the mathematics of the algorithm, which involves the trigonometric functions, but it's easy to see that it goes around in a loop steadily plotting each pixel on the screen.

Making the Ball Bounce
Drawing a static circle or square is fine, but we didn't really need to use the Ebiten game framework to do that. We could easily have drawn those sort of images using the Image type from the "image/draw" package in Go's standard library.
So let's actually make the framework prove its worth by animating the movement of a circular ball across the screen, now that we know how to draw a basic circle.
I have reproduced my entire updated main.go file below, so you can see how everything fits together. The most important thing to note is that we now use the Update function to change the position of the ball, which is stored in global variables.
package main

import (
	"image/color"
	"math"
	ebiten "github.com/hajimehoshi/ebiten/v2"
)

const (
	screenWidth  = 300
	screenHeight = 300
	ballRadius = 15
)

type Game struct{}

func (g *Game) Layout(outsideWidth, outsideHeight int) (int, int) {
	return screenWidth, screenHeight
}

var (
	ballPositionX = float64(screenWidth) / 2
	ballPositionY = float64(screenHeight) / 2
	ballMovementX = float64(0.5)
	ballMovementY = float64(0.75)
)

func (g *Game) Update() error {
	ballPositionX += ballMovementX
	ballPositionY += ballMovementY

	if ballPositionX >= screenWidth-ballRadius || ballPositionX <= ballRadius {
		ballMovementX *= -1
	}
	if ballPositionY >= screenHeight-ballRadius || ballPositionY <= ballRadius {
		ballMovementY *= -1
	}

	return nil
}

func (g *Game) drawCircle(screen *ebiten.Image, x, y, radius int, clr color.Color) {
	radius64 := float64(radius)
	minAngle := math.Acos(1 - 1/radius64)

	for angle := float64(0); angle <= 360; angle += minAngle {
		xDelta := radius64 * math.Cos(angle)
		yDelta := radius64 * math.Sin(angle)
		x1 := int(math.Round(float64(x) + xDelta))
		y1 := int(math.Round(float64(y) + yDelta))
		screen.Set(x1, y1, clr)
	}
}
func (g *Game) Draw(screen *ebiten.Image) {
	purpleClr := color.RGBA{255, 0, 255, 255}
	x := int(math.Round(ballPositionX))
	y := int(math.Round(ballPositionY))

	g.drawCircle(screen, x, y, ballRadius, purpleClr)
}

func main() {
	ebiten.SetWindowSize(screenWidth*2, screenHeight*2)
	ebiten.SetWindowTitle("The Moving Ball")

	if err := ebiten.RunGame(&Game{}); err != nil {
		panic(err)
	}
}
The ball moves at a constant speed. You can see how this is achieved in the Update function, where the movement values are simply added to the current position on every frame of the animation.
If the ball's position has reached any of the four borders (top, bottom, left or right), then the movement values are negated, so that the ball starts to move in the opposite direction. That very simple logic ensures that it will never escape from the screen and will always remain visible.
Improving the Bounce With a Time Delta
As we discussed in the previous section, the ball moves at a constant speed on every frame — but the performance of a computer is not always constant, meaning that the program may take more or less time between frames if the processor is more or less busy with other work in the background.
So we need to account for that and adjust our movement accordingly, so that if the time between frames is short, the movement will be less, and if the time is long, the movement will be greater:
var (
	ballPositionX  = float64(screenWidth) / 2
	ballPositionY  = float64(screenHeight) / 2
	ballMovementX  = float64(0.00000006)
	ballMovementY  = float64(0.00000004)
	prevUpdateTime = time.Now()
)

func (g *Game) Update() error {
	timeDelta := float64(time.Since(prevUpdateTime))
	prevUpdateTime = time.Now()

	ballPositionX += ballMovementX * timeDelta
	ballPositionY += ballMovementY * timeDelta

	const minX = ballRadius
	const minY = ballRadius
	const maxX = screenWidth - ballRadius
	const maxY = screenHeight - ballRadius

	if ballPositionX >= maxX || ballPositionX <= minX {
		if ballPositionX > maxX {
			ballPositionX = maxX
		} else if ballPositionX < minX {
			ballPositionX = minX
		}

		ballMovementX *= -1
	}

	if ballPositionY >= maxY || ballPositionY <= minY {
		if ballPositionY > maxY {
			ballPositionY = maxY
		} else if ballPositionY < minY {
			ballPositionY = minY
		}

		ballMovementY *= -1
	}

	return nil
}
First of all, we declare a new global variable, prevUpdateTime, which simply records the last time the Update function ran. If the program has just started and the Update function has never run before, then we give it the current time.
This is because we use the gap — or, to use more mathematical terminology, the delta — between the time the Update function is currently running and the time that it last ran in order to adjust the movement speed. If the gap is very small, as it will be on the first iteration of the function, then there'll be very little movement, which is fine, because we don't really want the ball to move on the first frame, only the subsequent ones.
You can also see above how we set maximum and minimum values for the ball's position, in case our computer's performance is ever extremely slow and the ball is able to move outside the bounds of the screen in a single frame, before we have chance to invert the direction that the ball is moving. Explicitly setting the position will ensure that no part of the ball will ever be seen leaving the screen, even for a short amount of time.
Filling the Ball Using a Hacky Method
Up until now, we've just been drawing the outline of the ball with our circle-plotting algorithm. However, it would clearly be better if the ball were filled entirely with our chosen colour.
The easiest way to do this is with a recursive algorithm. If our radius is 15, we can simply call the outline-drawing function again for every radius from 14 down to 1. By using a boolean value that determines whether we want the circle to be filled in or not, we can always set it to false when we recursively call the function, so that it doesn't do much more work than necessary.
func (g *Game) drawCircle(screen *ebiten.Image, x, y, radius int, clr color.Color, fill bool) {
	radius64 := float64(radius)
	minAngle := math.Acos(1 - 1/radius64)
	for angle := float64(0); angle <= 360; angle += minAngle {
		xDelta := radius64 * math.Cos(angle)
		yDelta := radius64 * math.Sin(angle)
		x1 := int(math.Round(float64(x) + xDelta))
		y1 := int(math.Round(float64(y) + yDelta))
		screen.Set(x1, y1, clr)
	}
	if fill && radius > 1 {
		for r := radius - 1; r >= 1; r-- {
			g.drawCircle(screen, x, y, r, clr, false)
		}
	}
}
We now have a circle that is almost entirely filled in. However, there are a few pixels in the center of the circle that have remained unfilled, because of the imperfect nature of our estimated mathematical values.
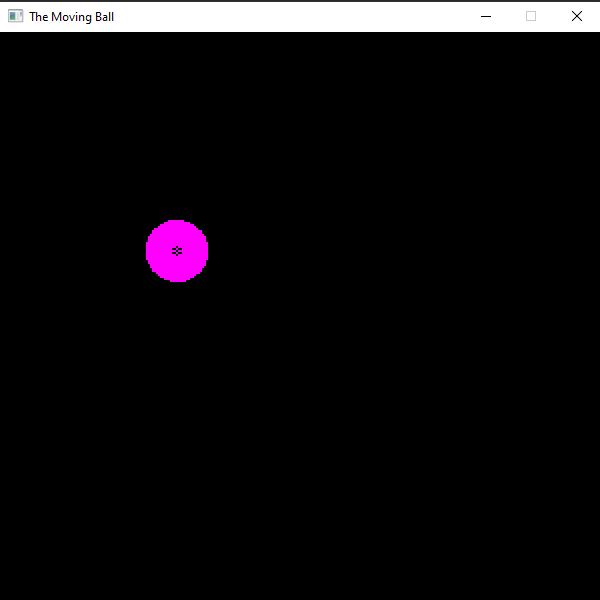
The easiest way to fix this problem is simply to draw a small square — as we saw how to do early in this post — at the centre of the circle, so that any gaps there are filled. The corners of the square will always be within the outline of our circle, so it won't actually be visible as a separate shape.
if fill && radius > 1 {
for r := radius - 1; r >= 1; r-- {
g.drawCircle(screen, x, y, r, clr, false)
}
const div = 3
for i := x - radius/div; i < x+radius/div; i++ {
for j := y - radius/div; j < y+radius/div; j++ {
screen.Set(i, j, clr)
}
}
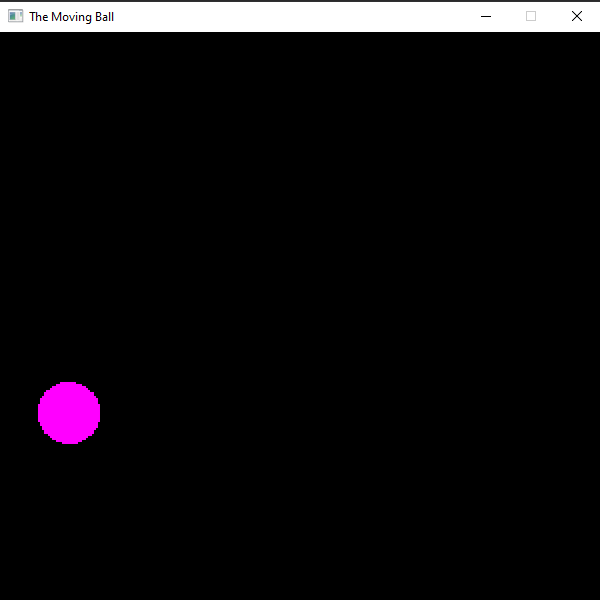
}The code above draws a square whose sides are two thirds the length of the circle's radius (or, in other words, one third the length of its diameter).
Filling the Ball Using a Slightly More Elegant Method
It's a great feeling to solve a tricky problem, but sometimes it's good to look back at the way you've solved it and wonder if you couldn't perhaps have done it in a better way. The recursion used to fill our circle is quite nice, but drawing a small square in the middle to hide any of the gaps is kind of hacky. Yes, it does the job, but it's not an elegant solution. It's not the sort of thing that I'm proud to show off.
So I looked back at my code, and I decided that this was an ideal opportunity to do some refactoring. That's not a bad way to approach any programming problem: if you always just get something working first of all, then you can come back and focus on making it nicer and neater, whenever you have any spare time later on.
I came to the conclusion that there's an obvious and simple solution to the problem that is much better than the one I'd originally chosen. When we paint every point on the outline of the circle, we can simply iterate in the y axis, moving upwards or downwards until we're parallel with the centre, painting those pixels as we go. (We could equally have chosen to iterate in the x axis, moving sideways until we're parallel with the centre.) That will ensure that every pixel within the circular outline is coloured as we expect.
So the approach that I've described above is the one that we take in the updated function below:
func (g *Game) drawCircle(screen *ebiten.Image, x, y, radius int, clr color.Color, fill bool) {
	radius64 := float64(radius)
	minAngle := math.Acos(1 - 1/radius64)

	for angle := float64(0); angle <= 360; angle += minAngle {
		xDelta := radius64 * math.Cos(angle)
		yDelta := radius64 * math.Sin(angle)

		x1 := int(math.Round(float64(x) + xDelta))
		y1 := int(math.Round(float64(y) + yDelta))

		if fill {
			if y1 < y {
				for y2 := y1; y2 <= y; y2++ {
					screen.Set(x1, y2, clr)
				}
			} else {
				for y2 := y1; y2 > y; y2-- {
					screen.Set(x1, y2, clr)
				}
			}
		}

		screen.Set(x1, y1, clr)
	}
}
Our new solution to the problem of filling the circle also has the advantage of being more efficient, not least because we no longer need to make any recursive function calls.
Rewriting Our Fill Method One Final Time
This solution still isn't perfect, however. So far we've been manipulating pixels one-by-one, which is fine for creating such a small circle, since there are so few pixels involved, but it's not an approach that scales well when working with more complex graphics.
With that in mind, I've completely rewritten the drawCircle function to use the native vector-graphics functionality provided by Ebiten:
var simpleShader *ebiten.Shader

func init() {
	var err error

	simpleShader, err = ebiten.NewShader([]byte(`
		package main

		func Fragment(position vec4, texCoord vec2, color vec4) vec4 {
			return color
		}
	`))
	if err != nil {
		panic(err)
	}
}

func (g *Game) drawCircle(screen *ebiten.Image, x, y, radius int, clr color.RGBA) {
	var path vector.Path

	path.MoveTo(float32(x), float32(y))
	path.Arc(float32(x), float32(y), float32(radius), 0, math.Pi*2, vector.Clockwise)

	vertices, indices := path.AppendVerticesAndIndicesForFilling(nil, nil)

	redScaled := float32(clr.R) / 255
	greenScaled := float32(clr.G) / 255
	blueScaled := float32(clr.B) / 255
	alphaScaled := float32(clr.A) / 255

	for i := range vertices {
		v := &vertices[i]

		v.ColorR = redScaled
		v.ColorG = greenScaled
		v.ColorB = blueScaled
		v.ColorA = alphaScaled
	}

	screen.DrawTrianglesShader(vertices, indices, simpleShader, &ebiten.DrawTrianglesShaderOptions{
		FillRule: ebiten.EvenOdd,
	})
}
If you've ever drawn to the HTML canvas element, the path.Arc method may look familiar, because we use it in a very similar way to the context.arc method that's available in Javascript. It allows us to plot a circle (or a smaller section of a circle, if we reduce the value of the endAngle argument, which is currently math.Pi*2) without having to rely on all the fancy but annoying trigonometry that we used earlier.
Modern graphics engines use lots of little triangles to approximate any other shapes that need to be drawn onto the screen. These triangles fit together in such a way that they shouldn't be individually visible, only as part of the larger shape.
Vertices (the plural of vertex) define the corners of the triangles and indices (the plural of index) define which of the vertices are used in each of the triangles. You can see how we iterate through each vertex, setting the correct colour, with each of the 8-bit Red-Green-Blue-Alpha values converted to a floating-point number between 0 and 1.
The screen.DrawTrianglesShader method, as the name suggests, simply renders the small triangles that will, in this case, give the appearance of a circle. The simpleShader variable is initialized using a specialized programming language similar to Go and its purpose is to adjust the colour of pixels at and around each vertex, allowing you to create effects of light and shade: here we just return the colour that we had already defined, so that our entire circle will remain a single shade of purple.
This new and improved drawCircle method is now able to make better use of the GPU than our original pixel-setting ones were, which is especially important when our designs become more computationally expensive and complex.
The Beginnings of a Game With User Input
We've come a long way, but, clearly, we're not going to be able to build a very elaborate or engaging game in this single blog post, since that would, in most cases, require many thousands of lines of code. However, I wanted to make the application interactive, so it does, at least, feel a little like a real game.
This is the final example, so I've included all of the code in my main.go file again below. You can copy-and-paste it into a text editor and compile the program to run on your machine, if you want.
package main

import (
	"image/color"
	"math"
	"time"

	"github.com/hajimehoshi/ebiten/v2"
	"github.com/hajimehoshi/ebiten/v2/inpututil"
	"github.com/hajimehoshi/ebiten/v2/vector"
)

const (
	screenWidth  = 300
	screenHeight = 300

	ballRadius                        = 15
	ballAccelerationConstant          = float64(0.0000000015)
	ballAccelerationSpeedUpMultiplier = float64(2)
	ballResistance                    = float64(0.975)
)

type Game struct {
	pressedKeys []ebiten.Key
}

func (g *Game) Layout(outsideWidth, outsideHeight int) (int, int) {
	return screenWidth, screenHeight
}

var (
	ballPositionX     = float64(screenWidth) / 2
	ballPositionY     = float64(screenHeight) / 2
	ballMovementX     = float64(0)
	ballMovementY     = float64(0)
	ballAccelerationX = float64(0)
	ballAccelerationY = float64(0)
	prevUpdateTime    = time.Now()
)

func (g *Game) Update() error {
	timeDelta := float64(time.Since(prevUpdateTime))
	prevUpdateTime = time.Now()

	g.pressedKeys = inpututil.AppendPressedKeys(g.pressedKeys[:0])

	ballAccelerationX = 0
	ballAccelerationY = 0

	acc := ballAccelerationConstant

	for _, key := range g.pressedKeys {
		switch key.String() {
		case "Space":
			acc *= ballAccelerationSpeedUpMultiplier
		}
	}

	for _, key := range g.pressedKeys {
		switch key.String() {
		case "ArrowDown":
			ballAccelerationY = acc
		case "ArrowUp":
			ballAccelerationY = -acc
		case "ArrowRight":
			ballAccelerationX = acc
		case "ArrowLeft":
			ballAccelerationX = -acc
		}
	}

	ballMovementY += ballAccelerationY
	ballMovementX += ballAccelerationX

	ballMovementX *= ballResistance
	ballMovementY *= ballResistance

	ballPositionX += ballMovementX * timeDelta
	ballPositionY += ballMovementY * timeDelta

	const minX = ballRadius
	const minY = ballRadius
	const maxX = screenWidth - ballRadius
	const maxY = screenHeight - ballRadius

	if ballPositionX >= maxX || ballPositionX <= minX {
		if ballPositionX > maxX {
			ballPositionX = maxX
		} else if ballPositionX < minX {
			ballPositionX = minX
		}

		ballMovementX *= -1
	}

	if ballPositionY >= maxY || ballPositionY <= minY {
		if ballPositionY > maxY {
			ballPositionY = maxY
		} else if ballPositionY < minY {
			ballPositionY = minY
		}

		ballMovementY *= -1
	}

	return nil
}

var simpleShader *ebiten.Shader

func init() {
	var err error

	simpleShader, err = ebiten.NewShader([]byte(`
		package main

		func Fragment(position vec4, texCoord vec2, color vec4) vec4 {
			return color
		}
	`))
	if err != nil {
		panic(err)
	}
}

func (g *Game) drawCircle(screen *ebiten.Image, x, y, radius float32, clr color.RGBA) {
	var path vector.Path

	path.MoveTo(x, y)
	path.Arc(x, y, radius, 0, math.Pi*2, vector.Clockwise)

	vertices, indices := path.AppendVerticesAndIndicesForFilling(nil, nil)

	redScaled := float32(clr.R) / 255
	greenScaled := float32(clr.G) / 255
	blueScaled := float32(clr.B) / 255
	alphaScaled := float32(clr.A) / 255

	for i := range vertices {
		v := &vertices[i]

		v.ColorR = redScaled
		v.ColorG = greenScaled
		v.ColorB = blueScaled
		v.ColorA = alphaScaled
	}

	screen.DrawTrianglesShader(vertices, indices, simpleShader, &ebiten.DrawTrianglesShaderOptions{
		FillRule: ebiten.EvenOdd,
	})
}

func (g *Game) Draw(screen *ebiten.Image) {
	purpleClr := color.RGBA{255, 0, 255, 255}

	g.drawCircle(
		screen,
		float32(ballPositionX),
		float32(ballPositionY),
		float32(ballRadius),
		purpleClr,
	)
}

func main() {
	ebiten.SetWindowSize(screenWidth*2, screenHeight*2)
	ebiten.SetWindowTitle("The Incredible Movable Ball")

	if err := ebiten.RunGame(&Game{}); err != nil {
		panic(err)
	}
}
You can see that we've added a new field to our game struct, which is a slice that's updated with information about the keyboard's currently held keys. The ebiten.Key type is just an alias for an integer value, which can be converted into a string that holds the name of a given key.
If one of the arrow buttons is pressed, the ball now moves in the corresponding direction. We've added acceleration values — as well as resistance, which slows the ball down naturally, when no arrow keys are pressed. If the space bar is held at the same time as one of the arrow keys, then the ball is accelerated at twice the usual speed.
Here's What Other People Have Achieved
The most impressive game to have been created using the Ebiten framework may be Bear's Restaurant, a vintage-style RPG that is available to download on the iOS app store and Google Play store, running natively on Apple and Android smartphones. It has already been downloaded more than a million times.
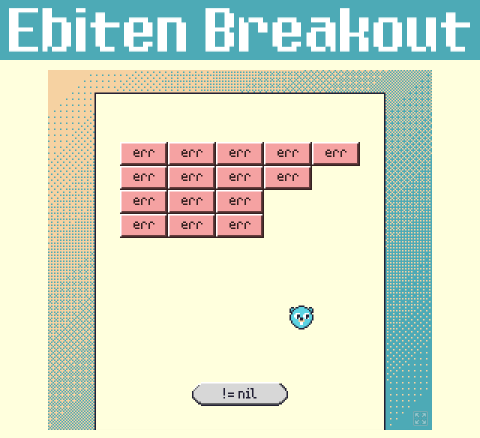
The independent developer Elias Daler recently created a simple but fun little game based on the 1970s arcade classic Breakout. He's compiled the code down to WebAssembly, so you can play it online in your browser. If you want to figure out how to work with images, sprites, sound effects and music — or other topics that we haven't been able to cover in this post — it's worth looking at his code: it's clean and well organized, so that's a great place to start if you want to see how Ebiten can be used to create the sort of games that are genuinely worth playing.
Hi, I loved this article! I would love to pick your brain about a my final year project in my CS degree, I am building a go version of asteroids! I already have the ship movement and an asteroid moving access the screen but I need a little help getting it to move randomly and generating multiple! Any help would be appreciated!
Thanks!
C
Thanks for the comment, Conor. I appreciate it!
Asteroids is a nice choice, because the logic isn’t extremely complex, but it’ll be fun to play and will look good when you’ve completed it. I can’t really do work on your code, if it’s for something important like your final project, but I’m very happy to look at what you’ve done and give you a few pointers to help you out, if you’re having some difficulties. Are you using Ebiten in the project too?
You can send me a private message on Twitter (@GolangProject) and I’ll see what I can do.
James
Hey i couldnt send you a message on twitter do you have an email address?
I’ve just sent you an email on the address that you used to comment here.
James
Hi, have you had any luck building a mobile version of this? I’ve tried but keep running it strange errors all over the place
I haven’t ever built code for mobile using Ebitengine, no. Sorry about that.
If the errors are really perplexing, maybe you could contact Hajime Hoshi and see if he can help.
On the other hand, if you just want a quick workaround, maybe you could try building it for WebAssembly and use a WebView on Android (or something similar on iOS) to display it.