256 Shades of Grey: Converting Colour Images to Greyscale
Language
- unknown
by James (Golang Project Structure Admin)
In this post, I am going to show you how to transform a full-colour image into one made up entirely of different shades of grey. The sort of image that we will create is called greyscale, because every colour that makes up the image is stored as a position on a predetermined scale of greys that starts at black and ends at white.
We will also later use this greyscale image to produce a purely black-and-white one, which uses only those two colours, with no greys in between.
Table of Contents
Choosing an Image to Work With
If we’re going to be able to test the code that we will write fairly, it makes sense that we should all start by trying to manipulate the same image. Then you can compare the results that I share in this post with the ones that you achieve and see if you spot any differences.
I’ve chosen the depiction below of the famous 19th-century artist Vincent van Gogh, since it’s colourful and dramatic with contrasting areas of light and shade. We’re going to make it less colourful, but hopefully no less distinctive.
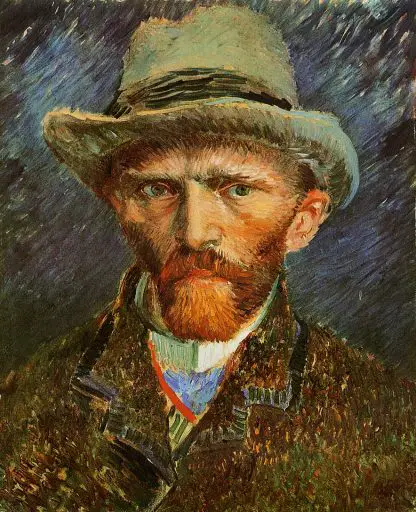
Right-click on the image of van Gogh and save to your computer in the same folder where you’re going to write the Go code. Rename the image to input.jpg, so it matches the file that I originally used.
Accessing Pixels
The simplest way to begin is to write a program that just gets some information about every one of the pixels in our image. A pixel is the smallest dot that has its own colour, and an image is just a collection of these dots that are stored in a single file and viewed altogether to produce the necessary visual effect.
package main

import (
	"fmt"
	"image"
	"image/color"
	_ "image/jpeg"
	"log"
	"os"
)

func main() {
	file, err := os.Open("input.jpg")
	if err != nil {
		log.Fatalln(err)
	}
	defer file.Close()

	img, _, err := image.Decode(file)
	if err != nil {
		log.Fatalln(err)
	}

	size := img.Bounds().Size()

	for x := 0; x < size.X; x++ {
		for y := 0; y < size.Y; y++ {
			pixel := img.At(x, y)
			col := color.RGBAModel.Convert(pixel).(color.RGBA)

			fmt.Printf(
				"RED: %d, GREEN: %d, BLUE: %d, ALPHA: %d\n",
				col.R, col.G, col.B, col.A,
			)
		}
	}
}
Notice how we used the underscore when importing the "image/jpeg" package, which was necessary to tell the Go compiler that we’re not going to be using any exported functions or constants from the package, but we still need to import the package for its side effects.
If we didn’t use the underscore, the go fmt command would remove the import entirely. In this case, that would remove our code’s ability to handle .jpg files, since the image.Decode function relies on the "image/jpeg" package’s side effects. If we were working with a .gif file instead, we would, for example, have imported the "image/gif" package.
You can see that the main functionality in the code above involves iterating through the x and y coordinates, to visit every pixel in the image. We get information about the pixel’s colour, making use of a color.RGBA struct, and we print out the red, green, blue and alpha values.
How Colours Are Stored
Every colour on a modern computer can be encoded using a combination of four bytes.
The first three bytes hold red, green and blue values. Each of these bytes is represented by a uint8 in Go, which can store a number from 0 to 255 (making a total of 256 different values), however, they could also have been represented by the native byte type, which is just an alias for uint8.
With the use of only three bytes, our computers can display 16,777,216 different colours (256³) — although our eyes may not be able to clearly distinguish each one of those colours!
The fourth byte is used to store the alpha value, which simply represents the colour’s transparency.
If the alpha value is set to 0, the colour is entirely see-through (so, in effect, it doesn’t matter what the red, green and blue values are, because the colour won’t be visible). If the alpha value is set to 255, the colour is completely opaque/non-transparent. Alpha values that are in between 0 and 255 will, naturally, be more or less transparent.
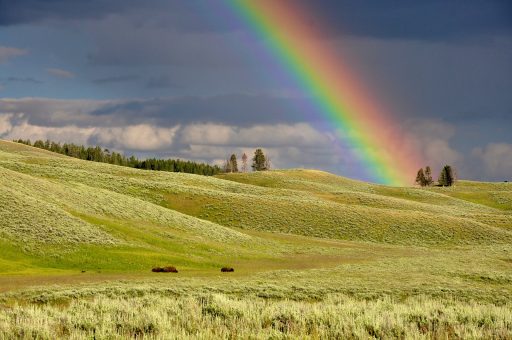
So for images without any transparency (such as our picture of the rainbow above or the portrait of van Gogh that we’re going to manipulate), all of the alpha bytes will be set to 255, the highest possible value.
Some Example RGB Values
Below is a list of various colours alongside their red-green-blue (RGB) values, so you can see the effect of different combinations:
| Colour Name | Red-Green-Blue Value |
|---|---|
| White | (255, 255, 255) |
| Black | (0, 0, 0) |
| Red | (255, 0, 0) |
| Green | (0, 255, 0) |
| Blue | (0, 0, 255) |
| Darker Red | (128, 0, 0) |
| Darker Green | (0, 128, 0) |
| Darker Blue | (0, 0, 128) |
| Lighter Green | (192, 255, 192) |
| Turquoise/Aquamarine | (0, 255, 255) |
| Yellow | (255, 255, 0) |
| Pink | (255, 0, 255) |
| Purple | (128, 0, 128) |
| Peach | (255, 128, 128) |
If you want to play around more with colours, or view the colours in the table above, you can use a colour-picker website that will allow you to enter RGB values.
Turning All of the Colours Grey
We’ve seen how to iterate through all of the pixels, so now we just need to work out how to modify them — and, more importantly, what to modify them to.
If the colour black has all of its red-green-blue values set to 0, and the colour white has all of its red-green-blue values set to 255, then we can infer that shades of grey will also have all of their RGB values set to the same number: lower numbers will produce a darker shade of grey and higher numbers will produce a lighter shade.
If that is the case, surely we can turn any colour into a shade of grey simply by averaging the three red-green-blue values (summing them together and dividing the result by three) and setting all three values to that single number. This is exactly the approach that we take in the code below:
package main

import (
	"image"
	"image/color"
	"image/jpeg"
	"log"
	"math"
	"os"
)

func toGreyscale(originalImage image.Image) image.Image {
	size := originalImage.Bounds().Size()
	rect := image.Rect(0, 0, size.X, size.Y)

	modifiedImg := image.NewRGBA(rect)

	for x := 0; x < size.X; x++ {
		for y := 0; y < size.Y; y++ {
			pixel := originalImage.At(x, y)
			originalColor := color.RGBAModel.Convert(pixel).(color.RGBA)

			red := float64(originalColor.R)
			green := float64(originalColor.G)
			blue := float64(originalColor.B)

			grey := uint8(
				math.Round((red+green+blue) / 3),
			)

			modifiedColor := color.RGBA{
				R: grey,
				G: grey,
				B: grey,
				A: originalColor.A,
			}

			modifiedImg.Set(x, y, modifiedColor)
		}
	}

	return modifiedImg
}

func main() {
	inputFile, err := os.Open("input.jpg")
	if err != nil {
		log.Fatalln(err)
	}
	defer inputFile.Close()

	img, _, err := image.Decode(inputFile)
	if err != nil {
		log.Fatalln(err)
	}

	greyImg := toGreyscale(img)

	outputFile, err := os.Create("output.jpg")
	if err != nil {
		log.Fatalln(err)
	}
	defer outputFile.Close()

	err = jpeg.Encode(outputFile, greyImg, nil)
	if err != nil {
		log.Fatalln(err)
	}
}
In a way, we are reducing the quality of information stored for each pixel of our image, because we are putting 3 bytes worth of information down into a single byte.
If we think mathematically, we can see how we could always reduce an n-length set of numbers (where n is greater than one) into a single number in this way, simply by taking the average — and while we won’t be able to reconstruct the original numbers from the final number, its value will still be highly dependent on them. The final number will preserve some important information about the original numbers, even though it is logically impossible for it to contain exactly the same amount of information. This is precisely why we consider averages so useful: they preserve but simplify.
In each iteration of the inner loop — turning back to our code example — we keep the alpha value exactly as it was originally, since we always want all pixels to be set to the maximum value, and then we use the Set method on our image to update each pixel with our new colour. Finally, we save the image as a .jpg file, so we can visually compare the original image with our modified greyscale image.
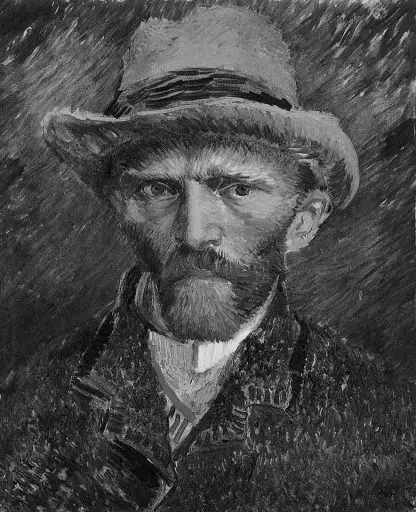
The Greyscale Result
The image below shows what the output image should look like. You can see that much of the same detail has been preserved, just without the use of bright colours.
Purely Black and White
Let’s take the previous approach to the extreme. Instead of using 256 shades of grey (or, technically, 254 greys + black + white) to recreate our image, let’s do something even more radical. Why not just use black and white? The entire image can be reproduced with only two colours, the darkest and lightest ones that our computers can handle.
The toBlackandWhite function below does just that:
package main

import (
	"image"
	"image/color"
)

func toGreyscale(originalImage image.Image) image.Image

func toBlackAndWhite(originalImage image.Image, whiteThreshold uint8) image.Image {
	originalImage = toGreyscale(originalImage)

	size := originalImage.Bounds().Size()
	rect := image.Rect(0, 0, size.X, size.Y)

	modifiedImg := image.NewRGBA(rect)

	for x := 0; x < size.X; x++ {
		for y := 0; y < size.Y; y++ {
			pixel := originalImage.At(x, y)
			originalColor := color.RGBAModel.Convert(pixel).(color.RGBA)
			modifiedColorValue := originalColor.R

			if modifiedColorValue >= whiteThreshold {
				modifiedColorValue = 255
			} else {
				modifiedColorValue = 0
			}

			modifiedColor := color.RGBA{
				R: modifiedColorValue,
				G: modifiedColorValue,
				B: modifiedColorValue,
				A: originalColor.A,
			}

			modifiedImg.Set(x, y, modifiedColor)
		}
	}

	return modifiedImg
}
In order to work out which pixels should be white and which should be black, our new function takes an extra whiteThreshold argument. We first convert the image to greyscale, using the code we already wrote (I’ve just included the function declaration here), and then we iterate through every pixel: if the value of each grey is greater than or equal to the white threshold, the colour becomes white, otherwise it becomes black.
It’s really as simple as that!
But that does leave us with one important unanswered question: how do we know what the threshold should be? We could just use trial-and-error, but it might be wise to start with a threshold of 128, since this is exactly in the middle of the range that the original colour’s value can be (between 0 and 255). That means that if each pixel originally contained a random shade of grey, then each pixel would be equally likely to become white as black.
If we find that our final image is too white, we can simply increase the threshold value. Conversely, if it’s too black, we can decrease the threshold.
We can assume, too, that if our original image is quite dark, we may need to start with a low threshold, and if it is quite light, we may need to use a high threshold.
I used the following code to call the function with my chosen threshold, keeping the rest of the main function as it was before:
const whiteThreshold = uint8(256 / 2) // 128
blackAndWhiteImg := toBlackAndWhite(img, whiteThreshold)
The 1-Bit Result
If the greyscale image can be called a 8-bit image (because it potentially includes 256 different values, which can be stored in a byte, 8 bits, and 256 is 2⁸), then our black-and-white image can be called a 1-bit image (because it potentially includes 2 different values, just white and black, and these can be stored in a single bit, since 2 is, by definition, 2¹). For that reason, it could also be called a binary image.
Below is the result I got when I ran the code with a threshold of 128. The image is very dark, which suggests that we might have been better using a lower threshold, but it’s a pretty good encapsulation of the original, considering that it’s only using two colours.
Letting the Computer Do the Hard Work
It seems difficult to choose the right threshold value for our toBlackAndWhite function. However, there are only 256 possible values. That doesn’t seem like a lot. So why don’t we simply produce all 256 possible images, using each of the different threshold values, and compare them to find the one that looks best?
We could do that by producing 256 different output images and comparing them visually ourselves, but it would be even better if we could write an algorithm that compares the different output images and only returns the one that it thinks is best.
But we need some way to judge between them. Let’s say that if half of the pixels in an output image are white and half are black, that would be a perfect result, since it’s an equal distribution of our two colours. So the closer that any output image is to that hypothetical situation, the more likely we are to return it.
In the code below, we count up the number of black pixels in each output image and compare it to half the number of total pixels. The closer these two numbers are, the better. We subtract the two numbers and take the absolute value of the difference, to ensure that it doesn’t matter whether either one of the two numbers is higher or lower, only that the distance between them is smaller than the distance recorded for any of the previous output images that we’ve considered:
package main

import (
	"image"
	"image/color"
	"fmt"
	"math"
	"sync"
)

func toGreyscale(originalImage image.Image) image.Image
func toBlackAndWhite(originalImage image.Image, whiteThreshold uint8) image.Image

func toBlackAndWhiteWithCalculatedWhiteThreshold(originalImage image.Image) image.Image {
	size := originalImage.Bounds().Size()

	totalPixels := size.X * size.Y
	halfPixels := int(math.Round(float64(totalPixels) / 2))

	var closestThreshold uint8
	var closestHalfPixelsDelta int
	var closestImage image.Image

	var wg sync.WaitGroup
	var mutex sync.Mutex

	for i := 0; i < 256; i++ {
		wg.Add(1)

		go func(i int) {
			defer wg.Done()

			modifiedImg := toBlackAndWhite(originalImage, uint8(i))
			var blackPixels int

			for x := 0; x < size.X; x++ {
				for y := 0; y < size.Y; y++ {
					pixel := modifiedImg.At(x, y)
					col := color.RGBAModel.Convert(pixel).(color.RGBA)

					if col.R == 0 {
						blackPixels++
					}
				}
			}

			defer mutex.Unlock()
			mutex.Lock()

			halfPixelsDelta := int(math.Abs(float64(halfPixels - blackPixels)))

			if closestHalfPixelsDelta == 0 || halfPixelsDelta < closestHalfPixelsDelta {
				closestHalfPixelsDelta = halfPixelsDelta
				closestThreshold = uint8(i)
				closestImage = modifiedImg
			}
		}(i)
	}

	wg.Wait()

	fmt.Printf("CHOSEN THRESHOLD: %d\n", closestThreshold)

	return closestImage
}
Depending on the speed of your computer, this code may take considerably longer to run than the original toBlackAndWhite function, because it’s doing much more work — but it is making our lives easier by automating the choice of threshold value. Laziness is a virtue, because it encourages us to write code to solve our problems.
If we wanted to improve the efficiency further, we could cache the result of the toGreyscale function, which gets called once every time the toBlackAndWhite function runs.
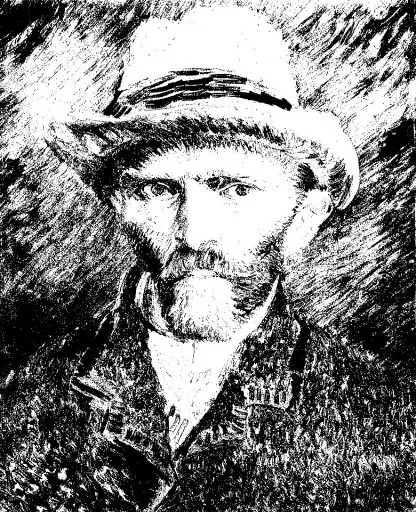
The Final 1-Bit Result
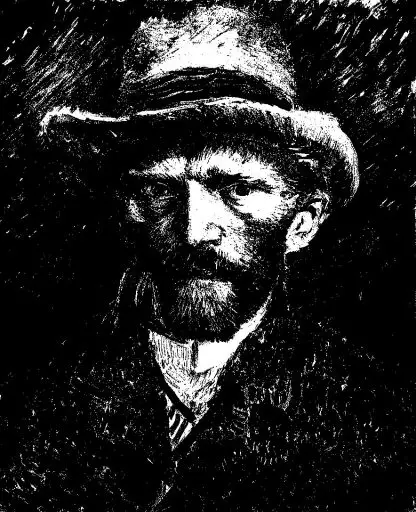
When I ran the code, this new algorithm chose a threshold of 92, which, as we predicted, is significantly lower than the one we had previously chosen ourselves.
This allows Vincent van Gogh’s face to be seen more clearly, accentuating the relative darkness of his beard. The lower threshold also preserves more of the impasto brushwork in the background, which is so distinctive of this style of post-impressionist art.