Drawing an Awesome Chessboard in Go
Language
- unknown
by James (Golang Project Structure Admin)
Since chess is one of the oldest games in the world, the black-and-white chessboard is an instantly recognizable design. It originated in Asia around 1,500 years ago.
In this post, we’ll create an image of a chessboard in the Go programming language. But we’ll gradually think through the problems involved before we actually draw it.
Table of Contents
Where Are the Black Squares?
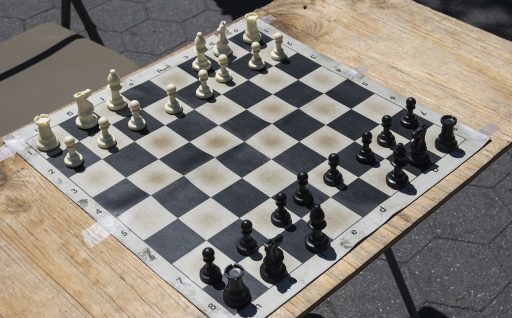
First of all, we’re going to work out which squares should be painted black and which should be painted white. You can see from the image above that a chessboard always starts with a white square in the top left. The remaining squares then alternate between white and black, so that squares of the same color only touch diagonally, never horizontally or vertically.
package main

import "fmt"

func main() {
	const chessboardSquaresPerSide = 8

	chessboardBlackSquares := make([][]bool, chessboardSquaresPerSide)

	for x := 0; x < chessboardSquaresPerSide; x++ {
		chessboardBlackSquares[x] = make([]bool, chessboardSquaresPerSide)

		for y := 0; y < chessboardSquaresPerSide; y++ {
			chessboardBlackSquares[x][y] = (x+y)%2 == 1
		}
	}

	fmt.Println(chessboardBlackSquares)
}
The code above creates a two-dimensional slice with a boolean value that represents each of the squares of the chessboard: it is true if the square should be painted black and false if not.
We decide whether each square should be black by working out whether the sum of our x and y coordinates is an odd number (using the conditional (x+y)%2 == 1). Remember, if n is a number, and n divided by two has no remainder, then n must be even, whereas if n modulo two is one, then the number must be odd — it’s not possible for there to be a remainder other than zero and one, since any number divided by two must have a remainder smaller than two.
(See this article on the Khan Academy if you want a refresher on how modular arithmetic works.)
Creating the Rectangles for Each Square of the Chessboard
Now that we know which squares should be painted black, we can calculate the coordinates for each square, which we will need in order to draw them. In our image, each side of every square will be 120 pixels long, meaning that each square will contain 14,400 individual pixels — i.e. 120². Since a chessboard always has 64 squares (8 rows by 8 columns), we can now calculate that our entire image will contain 921,600 pixels — i.e. (120 × 8)².
package main

import (
	"image"
)

func main() {
	const chessboardSquaresPerSide = 8
	const chessboardSquareSideSize = 120

	chessboardBlackSquareRects := make([]image.Rectangle, 0)
	chessboardWhiteSquareRects := make([]image.Rectangle, 0)

	for x := 0; x < chessboardSquaresPerSide; x++ {
		for y := 0; y < chessboardSquaresPerSide; y++ {
			x0 := x * chessboardSquareSideSize
			y0 := y * chessboardSquareSideSize
			x1 := x0 + chessboardSquareSideSize
			y1 := y0 + chessboardSquareSideSize

			rect := image.Rect(x0, y0, x1, y1)

			if isBlack := (x+y)%2 == 1; isBlack {
				chessboardBlackSquareRects = append(chessboardBlackSquareRects, rect)
			} else {
				chessboardWhiteSquareRects = append(chessboardWhiteSquareRects, rect)
			}
		}
	}
}
You can see above how we use our constant values to calculate the coordinates for the top-left and bottom-right points of each square, allowing us to create the image.Rectangle structs that we store in one of two slices, depending on the color that the square will be painted.
If we hadn’t used the image.Rect helper function, which populates a image.Rectangle struct for us, we could have created one manually, like so:
rect := image.Rectangle{
	Min: image.Point{X: x0, Y: y0},
	Max: image.Point{X: x1, Y: y1},
}
Drawing the Board
We’ve done the difficult work, so we’re now ready to do the interesting bit — actually creating an image. Below we create an image using the dimensions we’ve calculated, then we draw the black and white rectangles using the data that we stored:
package main

import (
	"image"
	"image/color"
	"image/draw"
	"image/png"
	"os"
)

func main() {
	const chessboardSquaresPerSide = 8
	const chessboardSquareSideSize = 120

	chessboardBlackSquareRects := make([]image.Rectangle, 0)
	chessboardWhiteSquareRects := make([]image.Rectangle, 0)

	for x := 0; x < chessboardSquaresPerSide; x++ {
		for y := 0; y < chessboardSquaresPerSide; y++ {
			x0 := x * chessboardSquareSideSize
			y0 := y * chessboardSquareSideSize
			x1 := x0 + chessboardSquareSideSize
			y1 := y0 + chessboardSquareSideSize

			rect := image.Rect(x0, y0, x1, y1)

			if isBlack := (x+y)%2 == 1; isBlack {
				chessboardBlackSquareRects = append(chessboardBlackSquareRects, rect)
			} else {
				chessboardWhiteSquareRects = append(chessboardWhiteSquareRects, rect)
			}
		}
	}

	const chessboardSideSize = chessboardSquaresPerSide * chessboardSquareSideSize

	chessboardRect := image.Rect(0, 0, chessboardSideSize, chessboardSideSize)
	chessboardImage := image.NewRGBA(chessboardRect)

	blackUniform := image.Uniform{color.Black}
	whiteUniform := image.Uniform{color.White}

	for _, rect := range chessboardBlackSquareRects {
		draw.Draw(chessboardImage, rect, &blackUniform, image.Point{}, draw.Src)
	}

	for _, rect := range chessboardWhiteSquareRects {
		draw.Draw(chessboardImage, rect, &whiteUniform, image.Point{}, draw.Src)
	}

	chessboardFile, err := os.Create("chessboard.png")
	if err != nil {
		panic(err)
	}

	png.Encode(chessboardFile, chessboardImage)
}
As you can see, we use Go’s standard library to encode the image as a .png file: it ensures that the data is laid out correctly, according to the rules of the file format, so we don’t have to.
Simplifying Our Code
You may have realized that we’re storing the data about rectangles and then drawing them separately, when we could just draw the rectangles and calculate their coordinates at the same time. So that’s exactly what we do below:
package main

import (
	"image"
	"image/color"
	"image/draw"
	"image/png"
	"os"
)

func main() {
	const chessboardSquaresPerSide = 8
	const chessboardSquareSideSize = 120
	const chessboardSideSize = chessboardSquaresPerSide * chessboardSquareSideSize

	chessboardRect := image.Rect(0, 0, chessboardSideSize, chessboardSideSize)
	chessboardImage := image.NewRGBA(chessboardRect)
	uniform := &image.Uniform{}

	for x := 0; x < chessboardSquaresPerSide; x++ {
		for y := 0; y < chessboardSquaresPerSide; y++ {
			x0 := x * chessboardSquareSideSize
			y0 := y * chessboardSquareSideSize
			x1 := x0 + chessboardSquareSideSize
			y1 := y0 + chessboardSquareSideSize

			rect := image.Rect(x0, y0, x1, y1)

			if isBlack := (x+y)%2 == 1; isBlack {
				uniform.C = color.Black
			} else {
				uniform.C = color.White
			}

			draw.Draw(chessboardImage, rect, uniform, image.Point{}, draw.Src)
		}
	}

	chessboardFile, err := os.Create("chessboard.png")
	if err != nil {
		panic(err)
	}

	png.Encode(chessboardFile, chessboardImage)
}
This is more efficient since we don’t assign memory to unnecessary slices, nor do we loop over the same squares twice. It’s always best to write code simply at first, get it working, and then spend some time refactoring it with performance and elegance in mind.
Using a Single Loop
Finally, we can simplify things even further by removing the nested loop. We don’t need to iterate through the x and y coordinates separately. We can simply enumerate all 64 of the squares on the chessboard, and do some division and modular arithmetic to derive the necessary coordinates. Look at how we do this inside the loop below:
package main

import (
	"image"
	"image/color"
	"image/draw"
	"image/png"
	"os"
)

func main() {
	const chessboardSquaresPerSide = 8
	const chessboardSquares = chessboardSquaresPerSide * chessboardSquaresPerSide

	const chessboardSquareSideSize = 120
	const chessboardSideSize = chessboardSquaresPerSide * chessboardSquareSideSize

	chessboardRect := image.Rect(0, 0, chessboardSideSize, chessboardSideSize)
	chessboardImage := image.NewRGBA(chessboardRect)
	uniform := &image.Uniform{}

	for s := 0; s < chessboardSquares; s++ {
		x := s / chessboardSquaresPerSide
		y := s % chessboardSquaresPerSide

		x0 := x * chessboardSquareSideSize
		y0 := y * chessboardSquareSideSize
		x1 := x0 + chessboardSquareSideSize
		y1 := y0 + chessboardSquareSideSize

		rect := image.Rect(x0, y0, x1, y1)

		if isBlack := (x+y)%2 == 1; isBlack {
			uniform.C = color.Black
		} else {
			uniform.C = color.White
		}

		draw.Draw(chessboardImage, rect, uniform, image.Point{}, draw.Src)
	}

	chessboardFile, err := os.Create("chessboard.png")
	if err != nil {
		panic(err)
	}

	if err := png.Encode(chessboardFile, chessboardImage); err != nil {
		chessboardFile.Close()
		panic(err)
	}

	if err := chessboardFile.Close(); err != nil {
		panic(err)
	}
}
In that final example, I’ve included some more error-checking when we encode the file. I’ve also closed the file handle, although that isn’t strictly necessary in our case, since the program terminates at that point and the file will be closed automatically.
The Finished Board
When you run the code, it should generate an image that looks like the one below, with an alternating pattern of black and white squares (where the top-left and bottom-right squares are white and the bottom-left and top-right squares are black):
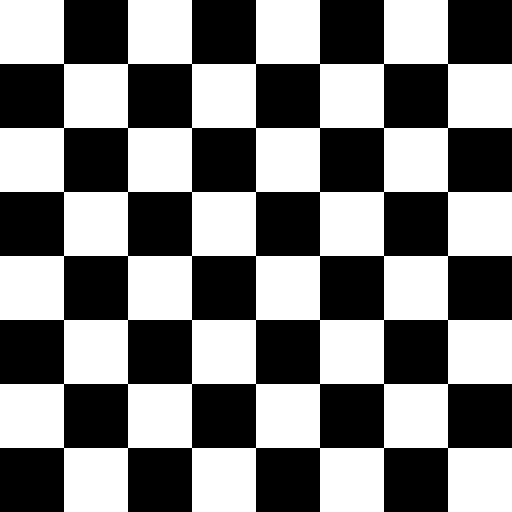
We have now created a perfect chessboard. You could even print it out and place your own chess pieces on it, if you want to play a real game with friends. You don’t need to carry a wooden board around with you, when you can generate an image like this in Go!
If you want an extra challenge, try adding numbers and letters to the board, from 1 to 8 along one side and from a to g along the other, so that players can use these identifiers to describe the chess moves that they’re making. Look at the image at the top of this post, if you need to see how they’re aligned.